|
|
Post by PiperxoxLeo on Mar 22, 2007 6:06:03 GMT 10
What bit are you floundering at? Let me know and I can help you.  Happy to help is Molly. |
|
|
|
Post by carsley on Mar 23, 2007 18:14:54 GMT 10
well, you see, the differnt layers made me cnfused.
i made new layers, and tooked the colors you told me to, but mine wasnt looking like that.
they looked exactlly the same, actully.
so .. can we take it over msn?
|
|
|
|
Post by Ergirl on Mar 24, 2007 9:01:24 GMT 10
Thank you all for your photoshop help...i have downloaded it and am now learning (if very slowly) how to use it and having lotsa fun! All you're little tutorials are really helpful Thank you xxx PS. Whenever i open pictures in photoshop, they all look really dark, not like they do when you open them in other programmes. Can anyone help me with what to do about this? Thanks! |
|
|
|
Post by carsley on Mar 25, 2007 6:47:44 GMT 10
I am thinking about to make a tutorial myself.  ASAP, promise. Tho my photoshop is in swedish, so might be hard to understand what i mean and so ... But I'll try.  |
|
|
|
Post by Ergirl on Mar 25, 2007 7:23:42 GMT 10
Sounds awesome...any tutorials are useful to me as i know...well nothing!!!  xxxx |
|
|
|
Post by PiperxoxLeo on Mar 25, 2007 10:27:43 GMT 10
I was going to do another tutorial but most of mine are with Selective Colour and Curves and not everyone understands those. I may give one a whirl sometime. |
|
|
|
Post by carsley on Mar 25, 2007 17:45:48 GMT 10
Here we goo. CAUTION. THIS IS JUST A EASY-MAKE-YOUR-OWN-AVATAR-TUTORIAL!!! NOTHING DIFFICULT! WE are gonna make a nice looking avatar by this picture! Step 1! Mark the places you want the avvie to be, like this, and press ctrl+C or go up to ''edit'' and click ''copy''*above* 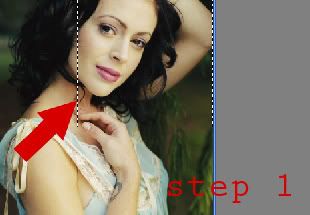 Step 2! Step 2!Then puch ctrl+N and open new with white background, and PASTE puch ctrl+V or go to edit again and click the ''paste'' button. and when you have the pic in the new place, time to rezice! 100x100 px is the usual size for avatars! 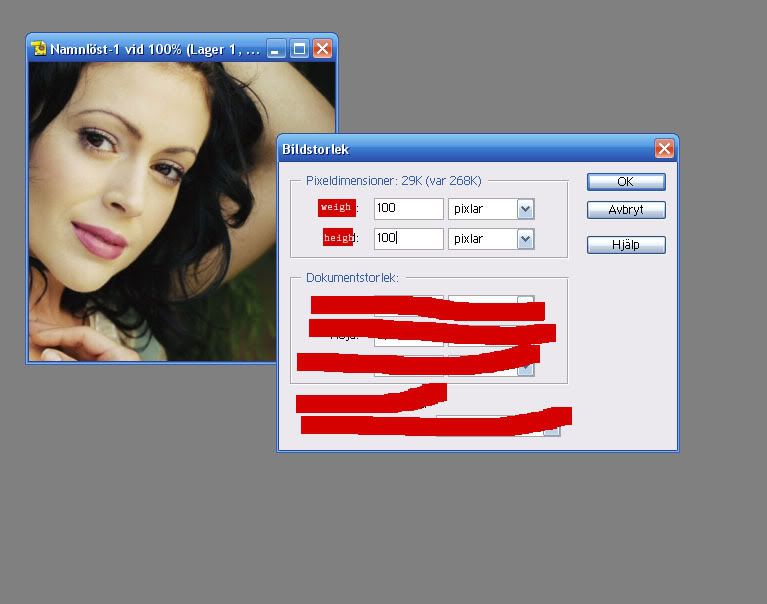 Step 3! Step 3!Now you should have a 100x100 avatar! Looking like this : 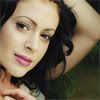 Step 4! (if you wanna make it hot hot hot lol) Step 4! (if you wanna make it hot hot hot lol)Now we are gonna put some color on it ... ^^ As you can see above .. Hrrm. Use the thingys above. And ask if you need more help. I suck at explain. Really. 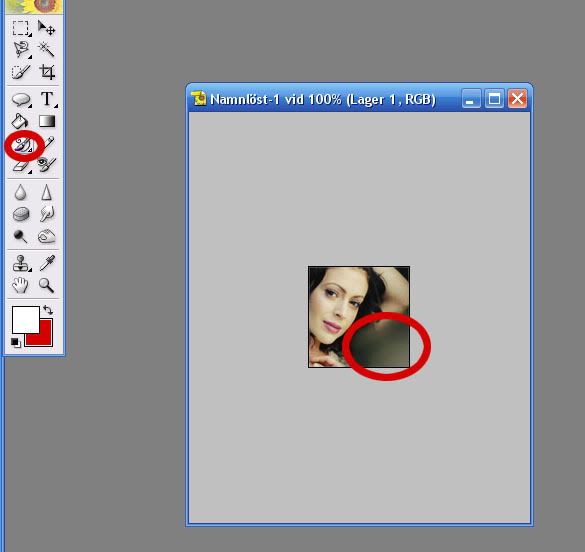 Step 5! Final Step!! Perhaps you want a frame? If you do, look here! mark again (as u did in the frist step) and right click on the image. Then you'll see some options there should be one called ''frame'' if not, ask me. 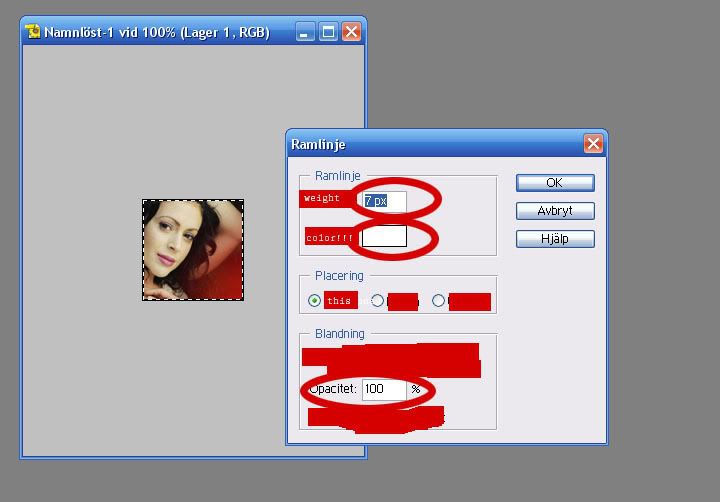 Done! Mine went this. lol  tho i am VEEEERY sure your looks better! <3 |
|
|
|
Post by PiperxoxLeo on Mar 25, 2007 23:55:36 GMT 10
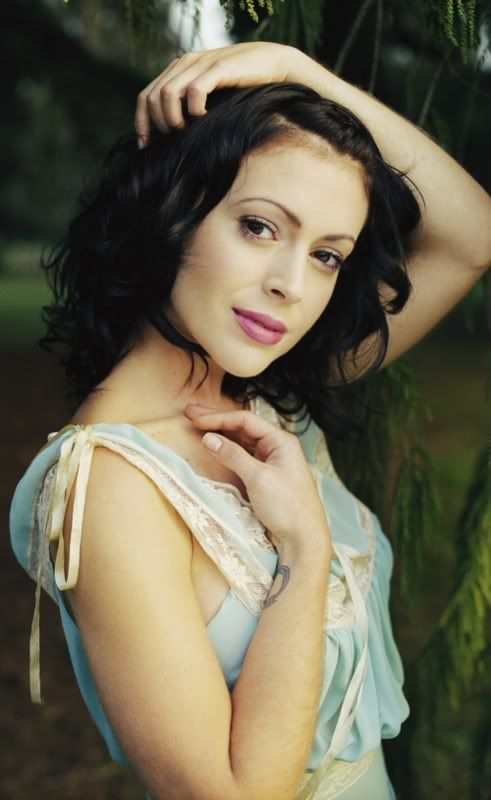
I like the tutorial, though I can do it and stuff....but IT'S ALYSSA MILANO! Karma simply because it is Alyssa. |
|
|
|
Post by Mrs. Zebra (aka Roosje) on Mar 27, 2007 2:48:37 GMT 10
Molly, I'd love to see one of your selective colouring and curves tutorials. I love working with those.
Magda, it looks very pretty. Which programme did you use?
|
|
|
|
Post by carsley on Mar 27, 2007 2:56:12 GMT 10
Molly, I'd love to see one of your selective colouring and curves tutorials. I love working with those. ME TO!! SOO ME TO!! I wanna learn, Molly, cant wait! <3 Magda, it looks very pretty. Which programme did you use? Ohops, sorry I forgot to write that, on the totorial, I used Photoshop Elements 2.0.  |
|
|
|
Post by Ergirl on Mar 28, 2007 1:45:23 GMT 10
Thanks for the tutorial...im learning ...slowly!! You're all fab! Thanks for all help/tutorials xxx |
|
|
|
Post by carsley on Mar 28, 2007 2:49:08 GMT 10
i made that special for starters!  just tell hun, if i can help more. this was my first totorial ever, soon i'll maybe get better .. like my totorial-idol-maker molly. |
|
|
|
Post by Mrs. Zebra (aka Roosje) on Mar 31, 2007 1:02:29 GMT 10
This is a tut I posted a long time ago on my LJ. It's to lighten up your icon without making it too light. I recommend using it on blueish pics. Made in Photoshop CS2. From  to  Duplicate your base and set it to Screen. Create a new layer and fill it with #161649, set it to Exclusion. Create another new layer, fill it with #c2d7c9 set it to Color Burn. Duplicate your base, drag it to top and set it to Screen. Go to Layer > New Adjustment Layer > Hue/Saturation. Set Saturation to +22 Then go to Layer > New Adjustment Layer > Selective Color REDS Cyan - 100 Yellow +100 Add some text and you're done. I used the font violation. |
|
|
|
Post by cece2087 on Mar 31, 2007 3:04:23 GMT 10
I made a tutorial! It's my first one so I apologize if its bad or hard to follow. I made it in PSP but I'm pretty sure all of the steps can be translated into the other programs. Ok, we're going to be making this icon:  1. Start with your picture: img.photobucket.com/albums/v296/cece2087/ER/Tutorial/secrets33.jpg2. Crop and resize to 100x100 pixels.  3. Duplicate twice. Set the first copy (bottom) to Screen (100%) and the second copy (top) to Soft Light (100%)  4. Create a new Raster Layer and fill with #F9ECEB. Set to Burn (100%)  -->  5. Create a new Raster Layer and fill with #E4F4F8. Set to Burn (100%)  -->  6. Select All (Ctrl+A), then Copy Merged (Ctrl+Shift+C), then Paste as a new layer (Ctrl +L) twice. Set the first layer (bottom) to Screen (30%)  And then the second layer (top) to Soft Light (40%)  7. Then select the Screen layer and go to Adjust --> Blur --> Gaussian Blur. Set the radius at 1, and press ok. Repeat for the Soft Light layer. And that's it!! The last step doesn't make much of a difference, but I find that it softens the icon a bit. If you like how it looks after Step 6, feel free to keep it that way! |
|
|
|
Post by carsley on Apr 1, 2007 16:51:54 GMT 10
AAAAAMAAAZING TOTORIAAAAALS!!! KARMA x 2 for you guys!!!! execclent. i will post my result here as soon as i am done. WOW AMAZING! GREAT JOB! *proud to be a mod of this execellt thread with these exellent people* *thud*  |
|

 Happy to help is Molly.